 Co-financed by the European Union
Awning Assembly and Installation
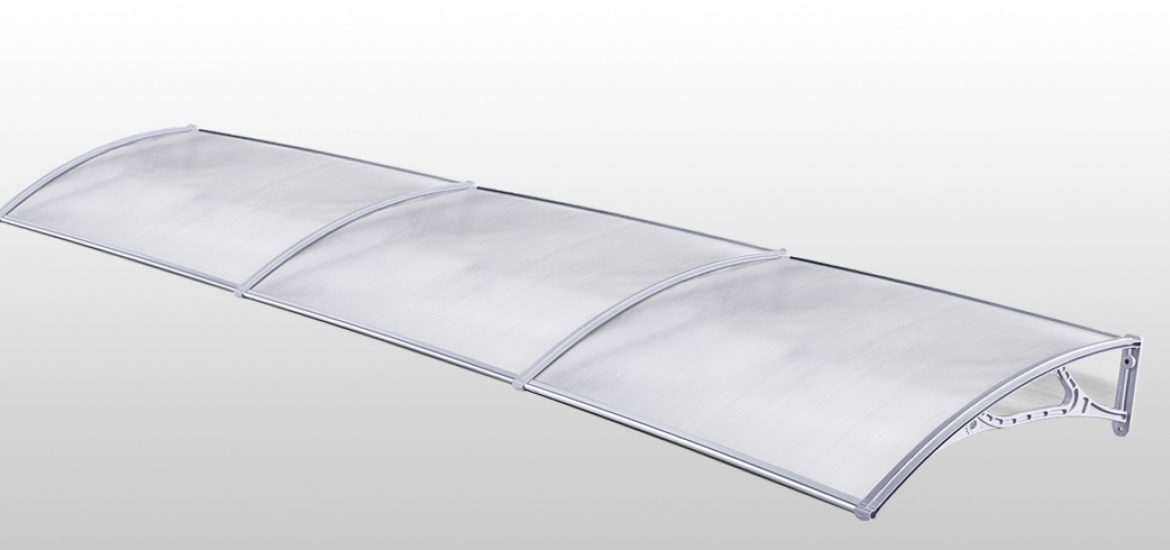
Awnings may be installed over doors and windows. Available in clear, opal white or brown tinted polycarbonate, these awnings offer shading from direct sunlight and protection from rain. Lightweight and durable, the brackets support up to 150kg each making them resistant to strong winds.
You can order your awnings online by clicking THIS LINK
Assembly and installation of polycarbonate awnings is easier than you might think. With the right preparation and some basic tools (and maybe a kind soul to lend a hand), awnings can be assembled and installed in an hour... here's how!
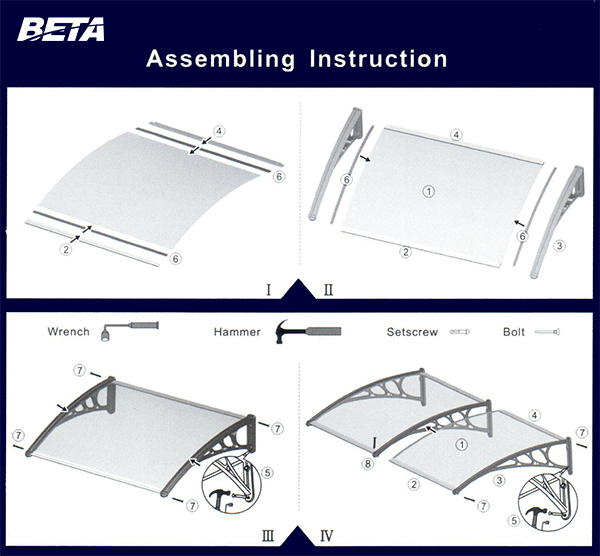
Assembly
- Mount rubber packing strips (6) to long sides of PC sheet and aluminium front (2) and rear (4) profiles
- Mount rubber packing strips (6) to short sides of PC sheet and mount brackets (3) onto PC sheet and aluminium profiles.
- Fix screws (7) into front and back of bracket of both sides, securing this to aluminium profile. When connecting multiple units side by side, one bracket in between two units is used. We recommend fixing a small screw (not included) from above to secure both bracketsto PC sheet. Alternatively, two awnings may be installed side by side and the joint in between brackets should be sealed with transparent silicone. Thisinstallation method is stronger than installing with a common bracket and is recommended for areas prone to strong wind.
Installation
- Find and mark centre of door / window opening and mark centre of assembled awning. Place awning onto wall and align the two centre marks.
- Ensure awning is level using a spirit level and mark out bracket holes onto wall using a pencil.
- Remove awning. Using a 10mm masonary bit, drill 4 holes for bracket bolts in marked bracket holes. Drill depth should be equal to bolt length.
- Place awning onto wall again, aligning bracket holes with drilled holes. Insert bolts into holes and tighten to secure awning to wall. Install plastic bolt covers using a bit of clear silicone to prevent them from falling.
- Using clear silicone, seal rear aluminium profile against wall from above, to prevent water seeping from behind awning. If awnings were installed side by side, seal the gap in between brackets from above using clear silicone.
Useful Tip -To make centering and levelling of awning easier, especially when working alone, cut a thin piece of plywood or stiff card into a rectangle, large enough for both brackets of awning to fit onto. Centre and align awning onto plywood and mark out centre and drill bracket holes onto this. Then use this 'model' to align and level the bracket holes onto the wall. This will be easier and lighter to handle than the assembled awning.